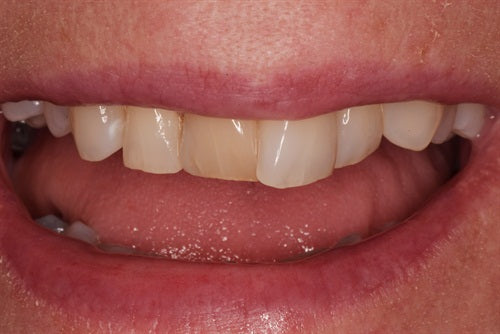
Direct composite veneers on rotated and overlapped teeth
Posted on November 05 2016
Composite veneers were placed at varying thicknesses on teeth #'s 7,8,9,10, & 11.
Before - Retracted view
Step 1

Before - Relaxed smile view
Step 2

Greater Curve "Wide" placed over #9.
Step 3

Retainer secured with Triad Gel
Step 4
Labial portion cut away. Excellent isolation deep into the interproximal. Cervical portion of the tooth sealed securely from gingival fluids.

Sequence:
Step 5
Clean and Boost (Apex), etched washed and dried, unfilled resin painted over the tooth in a thin layer, A1 Filtek Flowable placed interproximal and over entire surface, A1 Filtek snowplowed into the Flowable.

Greater Curve matrix removed
Step 6
The composite knife edges around the entire periphery of the tooth. It just a matter of shaping the labial surface to the proper contour.

Final veneers #'s 7,8,9,10 & 11
Step 7
Patient refused crown lengthening on #8.

Palatal view
Step 8
The varying thickness of the composites are obvious.

Final - Smile view
Step 9
Patient began to cry tears of joy. Dentistry has its' rewards.

Using the Greater Curve makes the hardest part of direct composite veneers much simpler by isolating and defining all the borders.


Connect